|
|
||||||||
|
|||||||||||||||||
|
|
| UT2003 - Ued3 Static Mesh Tutorial - by Willhaven |
Date:10/10/2002
|
|
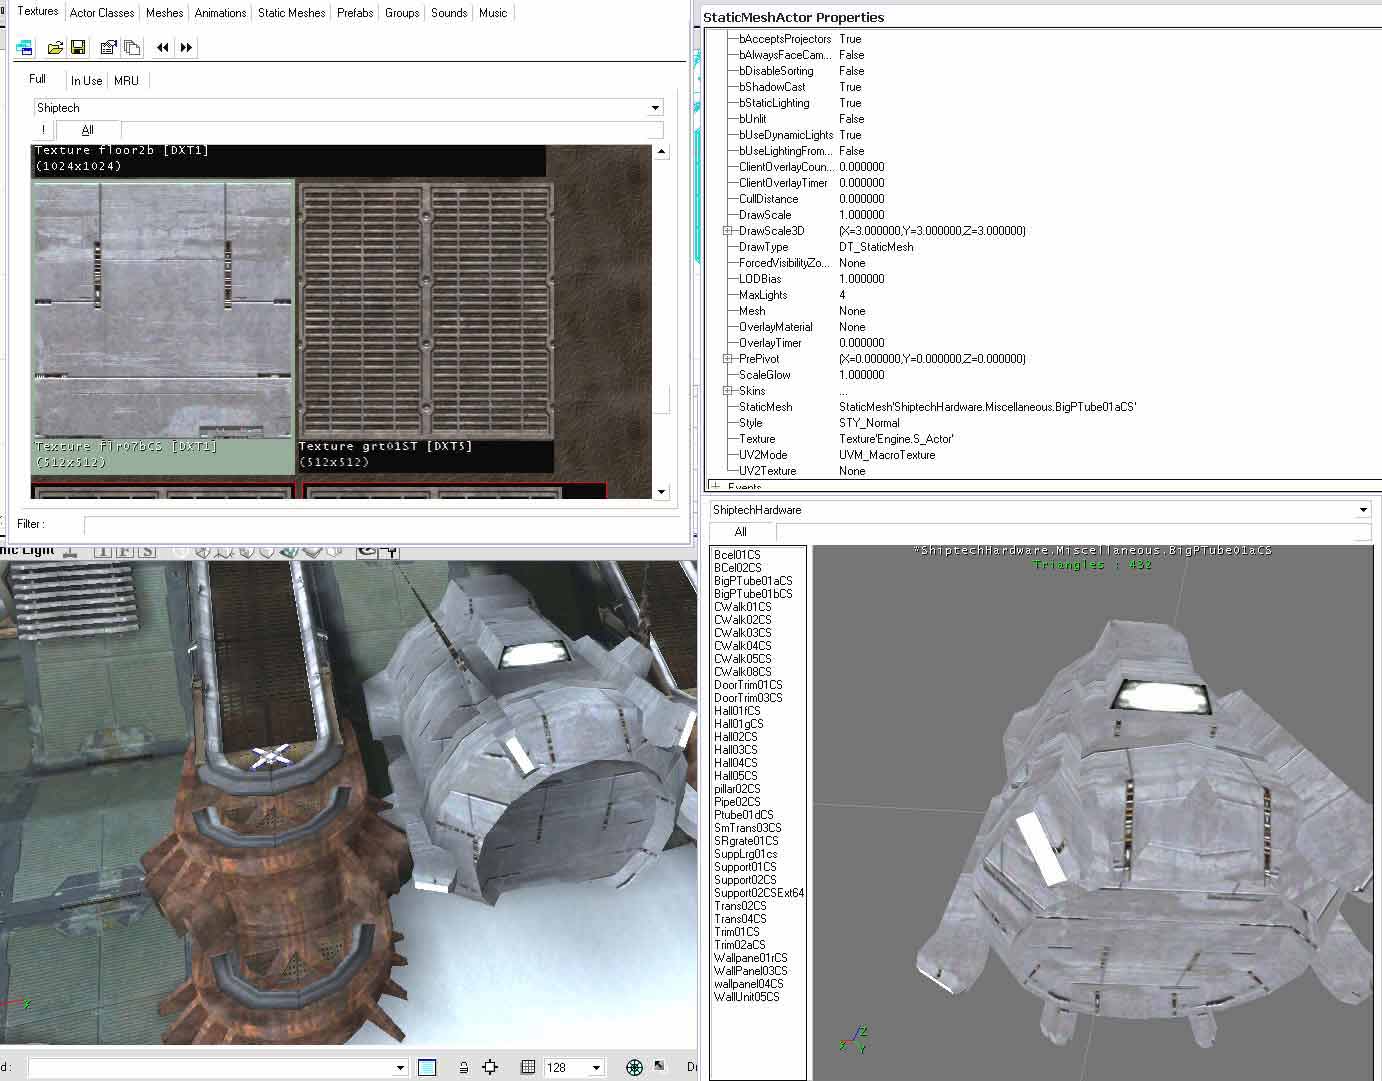
I was looking through the prefabs recently and saw a TON of cool shapes that had no skin and just had UGLY basic level textures applied to the shapes While playing the game Ii noticed that a lot of these shapes are in levels with a better high res skin with lots of detail. i thought to myself "they didnt go and make another copy of this staticmesh for this level because I haven't seen it in the browser" So I opened up the editor and figured it all out Basically I found that for a LOT of UGLY staticmeshes there are some really nice skins that don't show up in the staticmesh browser. I opened some of the levels and found out how it was done. Ive got two methods: (1) Re-skin an ugly mesh with a nice UVmapped skin AND (2) take a mesh with absolutely NO skin and switch the base texture work to yeild better results ingame. I will go step-by-step and show you guys how to do this. METHOD #1 The easiest way to find out which prefabs have a nice hidden skin for them is to go through the TEXTURES first. Looking through the package named ShiptechHardwareBrush.utx would seem to be a nice place to search for skins for the ShiptechHardare staticmeshes right? If this doesn't make any sense to you so far... might as well quit mapping because this is as easy as it gets. Now search through the textures and weed-out the skins that you can already tell go to staticmeshes you have already seen. Find a skin that looks unfamiliar. For this example I used Shader BigTubeP1ACSs. Now open the ShiptechHardware static mesh package and find the mesh named BigPTube1aCS... its not the exact name (the texture artist obviously put the P in the wrong place) but yes, this texture goes with this mesh. Place the UGLY mesh in your level, right-click on it and open its properties and click on the DISPLAY tab. Now scroll down to the bottom of the display area and notice the two entries UV2Mode and UV2Texture. The UV2Mode sets what the texture will do to the mesh... it can be various things. A macro texture, a lightmap (which is also useful), and a SKIN. ahhh... a skin. now set your UV2Mode to SKIN. Select the Shader BigTubeP1ACSs texture from the texture browser
and click on the UV2Texture area of the DISPLAY>PROPERTIES of
the static mesh... now click USE and BAM... your staticmesh should
now have the nice pretty skin shown in the before/after picture.
BEFORE PICTURE (enlarged picture 1832x1081)
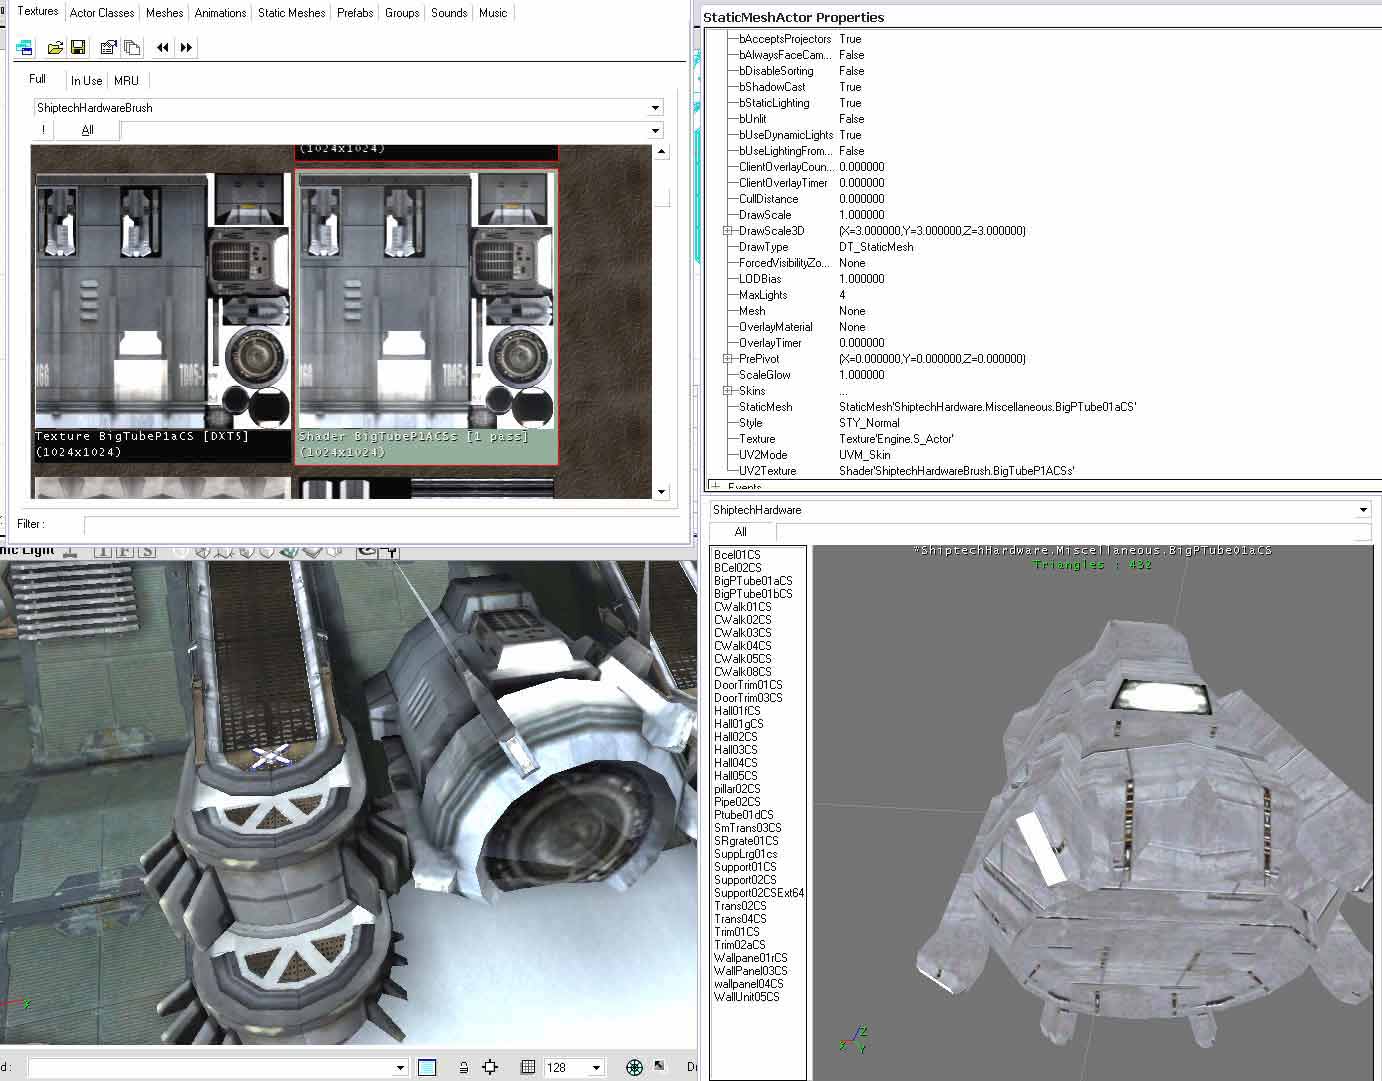
AFTER PICTURE (enlarged picture 1832x1081)
Doesn't the after picture look so much better? You can also see I did the same thing with other staticmeshes around this one. A good way to find out what particular staticmesh you are looking at is to open the DISPLAY of the mesh and scroll down and find its name... it will tell you what package and what the name of this static mesh is. So from there it would be easy to find the texture package which might contain a skin for this mesh. This should GREATLY increase anyones pallete of usable (non-ugly) static meshes considerably... ======================================= METHOD #2
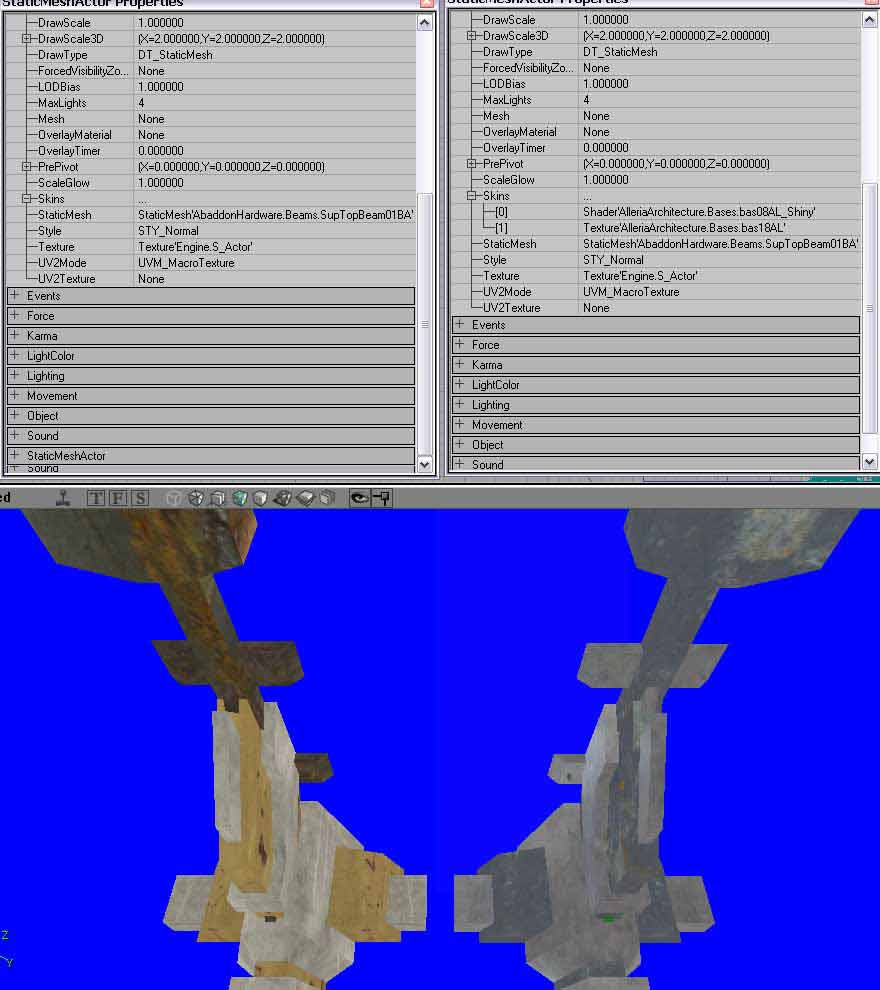
(enlarged picture 1832x1081) Ok... so you will notice from the texture packages that a lot of staticmeshes just DO NOT have a skin. In the event that you really like the shape of a particular static mesh, but it is skinless and has an ugly texture applied by default... you can still get around this. Most static meshes, in reality, have TWO seperate possible materials that you can apply to its surface. Some even have three I haive noticed. But the default is two. Take the above picture... the two staticmeshes on the left have their UGLY default textures. [sarcasm]white yellow and BROWN go together, I promise[/sarcasm] The shapes look cool together, but the textures clash BADLY. Now I figured out that you can set each texture used in the staticmesh to something else using the PROPERTIES>DISPLAY>SKINS menu (the same area of the staticmesh properties shown above). Click on SKINS and ADD... this will create [0] which will allow you to change skin 1 of the staticmesh. Select a base texture from ANY texture set then hit USE when you have [0] selected. BANG... one of the textures of the staticmesh is now the texture you selected. To change the next texture, click ADD again and [1] will appear. This will allow you to change the second skin on the static mesh. Now mess around with different texture combonations to get the effect/coloring desired. The staticmeshes on the right are the EXACT SAME staticmeshes but with a different texture applied. As far as i know, the original textures used are not even LOADED. You get greater continuity between your staticmeshes, you are able to combine what used to be apples and oranges, AND best of all... you cut the ammount of textures in your map (saves viedo memory)
|
||||
|
|
||||