|
|
||||||||
|
|||||||||||||||||
|
|
|
|||||||
|
|
|||||||
|
Bombing
Run hints/tips
|
| DEFENDING |
|
|
2) Defensive Weapons The correct choice of weapons is crucial to achieving better results at defending. This doesnt mean you cant use any of the other weapons other than the ones I have stated for defending. Learning these will definately increase your chances of keeping attackers at bay though. Good defensive weapons Shock rifle (Hard to learn) (For more info on the weapons check the page over at planet unreal here) These weapons tend to be scattered around the main hall and are easily available for denfense. Another good weapon is the rocket launcher, but this will take you valuble time to get and could let a fast attacker get to the goal before you can even begin to defend. No defenders and a quick attacker are 80% of most goals scored on servers with inexperienced defenders on. Let start off with showing you how to defend with the Shock Rifle.
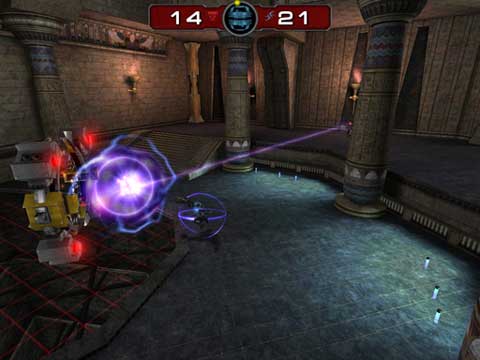
Using the Shock Rifle for Defending This is a great weapon to stop attackers dead although the secondary fire is a little slow it still packs a punch when used correctly. Its also great for knocking an attacker when he is jumping for the goal. This can be one of the hardest weapons to use when in moving but when stationary its easier and all a case of timing. If you are going to attempt this standing still make sure your hiding behind something. If the ball carrier has got passed you, quickly switch your weapon to the shock rifle and use the shock combo to either kill him or to knock him off his path if he has too much health. You could stand at the step area and wait for him to jump, but this isnt a great tactic to use as he has a good chance of scoring if you miss.
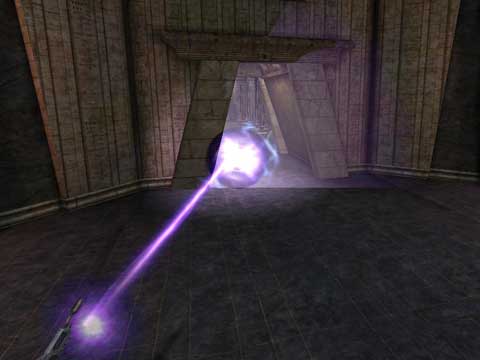
You can also use the combo to full effect in the goal mouth corridor. When you see the attacker appear run back into the goal area and wait until he is near, then combo the corridor. Getting past this will be very difficult though not impossible. Watch out for translocators coming through the corridor. Attackers will then be able to spawn behind you and have an easy target if you are unaware of them.
As you can see the combo on this rifle can be deadly, but be warned this comes with a price. The ammo will go down rapidy and there are only two ammo pods in the main hall to get to quickly so always monitor your ammo to avoid being caught short. The shock combo doesnt have to be used at these specific point for defending. You can keep your eye on the radar as to where the ball carrier will appear. Just position yourself in a good spot and then combo the passage when you see them appear.
|
|||||
| Previous < Basics | |||||
|
Page 2
|
|||||
|
|
||||